Wednesday, April 28, 2010
FreeNAS Review
I promised in my last tech post that this entry would continue, and hopefully conclude, my journey towards the perfect Network Attached Storage (NAS) system. The primary reason I want to use one is to stream TV Shows and Movies to my Samsung 40” LCD TV in my Living Room by means of my AppleTV. It also serves as a backup location for my important files, and is now capable of performing server related tasks that were previously handled by the AppleTV. This is my 4th attempt at a NAS solution for the Spitfire Network, the most expensive, the most capable, and finally…the most likely to survive. For a quick NAS summary:
| Eclipse (Gaming PC) | Too loud, power intensive, resource hog no redundancy | |
| Apple Extreme Wireless Station + USB HDD | Ran drive continuously leading to failure no redundancy | |
| Linksys NAS 200 | Ridiculously Poor Performance, Noisy | |
| Atom / FreeNAS | Best of all worlds but expensive, large footprint |
I tried all the cheap alternatives to buckling down and forking over the cash for a decent NAS / Server but in the end the only lesson is one we should all be familiar with already - You get what you pay for. In trying to be cheap, all I got in return was lost data (Apple Base Station) and unusable performance (Linksys + hosting files on my gaming pc). Not that a FreeNAS solution has to be expensive however. These days many people have a spare PC in their garage or something. All it needs to be given new life as a FreeNAS server is:
x86 Processor
128 MB ram
32 MB disk space
Network card
The catch is that your hardware has to be supported by FreeBSD, but I’d be willing to bet that if it’s anything similar to a commercial computer, you are all set. I looked into the option of buying a cheap, used PC for under $100 on craigslist but in the end I decided to build a new PC specifically for a few reasons:
1. I knew exactly what hardware it would have, with warranties.
2. By using an Atom chipset it has power consumption comparable to a netbook, which is preferable to a power hungry P4
3. The Atom D510MO chipset is fanless, making the entire computer almost silent
4. Gigabit Ethernet (up from 10/100 on the linksys nas)
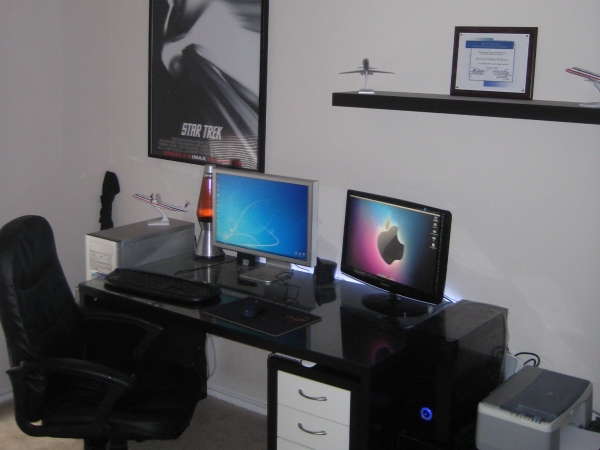 I bought a nice looking glossy black case from Newegg, which was running a pretty nice deal on it as long as I signed up for spam, and sold the Linksys NAS for $5 profit. I had the disk drives already from the linksys raid setup, so in the end I just had to buy the case, atom board/cpu combo, and 1 GB of RAM for it. Not too much cost to expand its use greatly, but if you were starting from scratch it might be a big investment. So give it a try with your old garage PC first. I paired the computer with a 23” Samsung 2333HD Display, which is kind of a misnomer. The actual NAS is capable of displaying a typical Unix/bsd console, but it’s really meant to run in a corner or a closet without a keyboard or monitor hooked up. In fact, there is no GUI display included. The monitor is really displaying video from my macbook pro, which makes the computer give the appearance of a hackintosh. It’s also a nice 1080p HDTV. The actual Atom computer runs without being plugged into the monitor, unless I’m debugging something.
So I spent all this money getting decent hardware, at least the software was free! You’ll need to decide between a “full install” or “embedded” install. The full install is like a typical OS installed onto your disk. The embedded install is copied to a USB Flash Drive which is then booted off of, and it runs FreeNAS in a virtual disk created out of RAM. The full install is easier to customize, but the embedded install is blistering fast and allows your hard drives to spin down when idle. I went with the embedded because it’s very important to me for the idle disks to spin down. This saves wear and tear, heat (remember it’s fanless), and power ($). You can’t repartition the boot drive, so I had to add another flash drive to run my custom server apps like rssdler and python. Running these apps off the main data HDDs would prevent them from spinning down (they’d never be idle). Flash drives are cheap SSDs and it works great for NAS purposes.
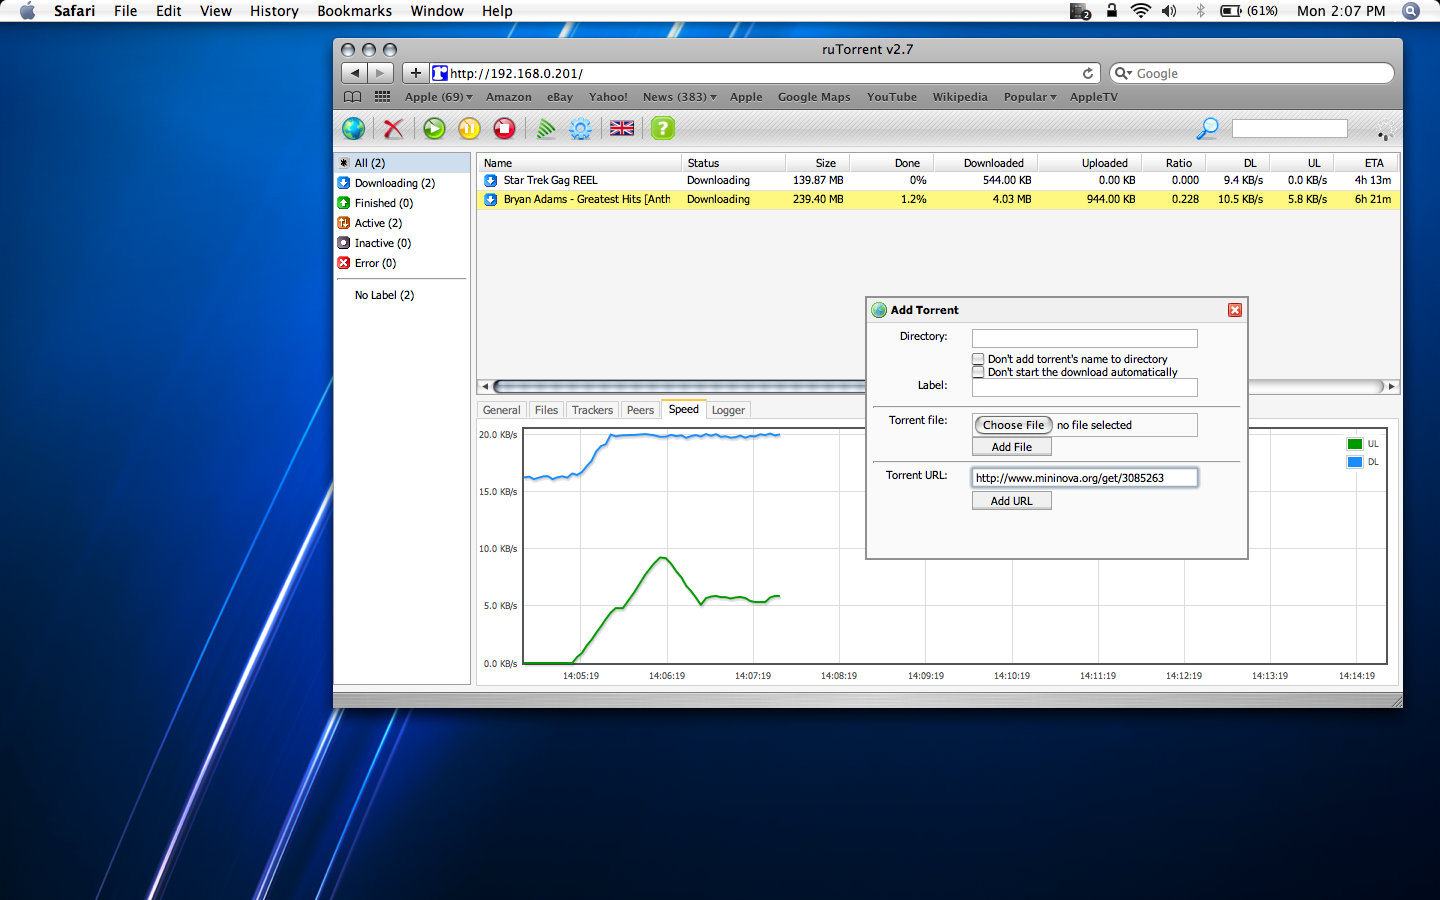
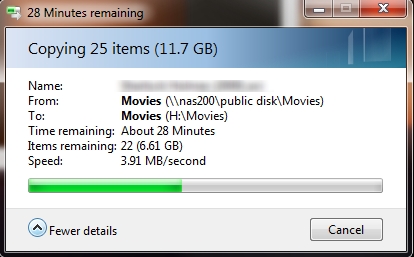
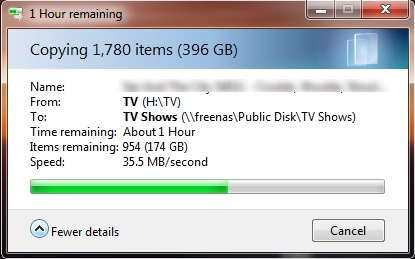
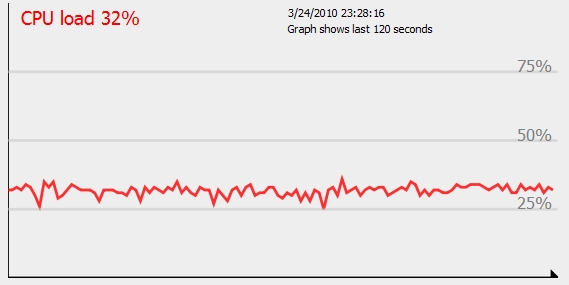
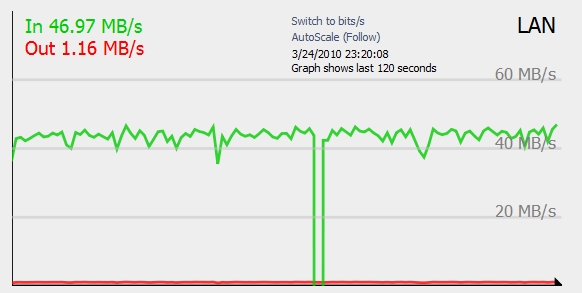
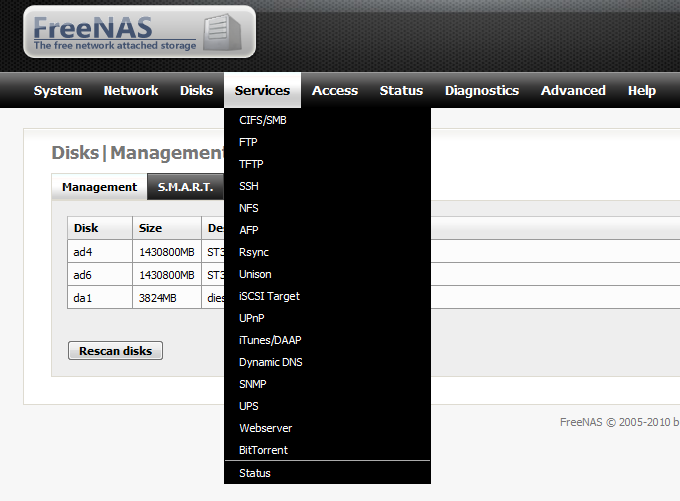
After the initial console setup, you can unplug the monitor and control the system via a web interface on any other computer on the network. This makes it very easy to choose services, set them up, add disks and shares… You really don’t have to be a pro to get it to work reliable and consistently. I followed a tutorial, added my two hard drives as a redundant software RAID 1 array, and added windows and apple file sharing in less than 20 minutes. Performance was a ten-fold increase over my Linksys NAS, averaging about 40MB/s transfers which I’m guessing is limited by the software RAID 1. But don’t take my word for it, here’s some fancy looking pictures:
|
|
|
|
My Atom server blows away any of my previous NAS attempts, and I’m finally happy and able to not worry anymore about my hard disks crashing and taking all my stuff with them like the great hard drive crashes of 2003. It’s far quieter and faster than the Linksys NAS, and I can run apps like rssdler off the server alone. This means the AppleTV, which is already slow, doesn’t have to use its few resources on downloading for me anymore. It uses waay less power than my gaming pc did when it stayed on to serve files, and adds the redundancy of two drives, protecting against hardware failure. The loss of one hard drive wouldn’t make me lose any data. The web interface is easy to use, and since it’s a mini-atx form factor, it’s got plenty of room for additional hard drive space so I can expand it over time. The Linksys and many other NAS devices only support a maximum of two disks. And did I mention how quiet it is?
The only disadvantages I could think of was the additional cost for having an additional computer. If you have an old PC and could throw it in the closet or something, this disadvantage may not mean much for you. Also, the mini-atx form factor eats up some desk space for me, but I want to keep it close to my other computers. Again if you threw it in a closet you might not care. I’m decent enough with Linux/Unix/bsd commands that I didn’t have any trouble setting it up, but if you’re a windows lover then buying a commercial NAS might be up your alley.
So in summary, I am totally blown away by FreeNAS and all it’s capable of. I tried everything else, but sometimes when you need the job done right you just have to do it yourself. My next tech post will probably be about AT&T U-Verse, how it’s integrated into my new house, changed my network, and reacted to my experiments.
Check out the free software at: http://freenas.org/freenas